You need extreme cleanliness. Even a bit of lint could mess up the intricate working inside an automatic transmission. This cannot be stressed enough. Surgical cleanliness is indicated, although the sterilization is probably overkill. Probably.
What you'll need is the following bits and pieces:
- B2 Piston - 107 270 04 32 (a 4th level supercession from the original number)
- Pan Gasket and Filter Kit - 126 270 0298
- K1 Spring Kit - 126 270 44 77 (not required but a good idea)
- 3 New Front Crossmember Bolts - ??? ??? ????
- Enough new transmission fluid to refill the tranny

There have been upgrades to the piston over the years and the part numbers above are the latest greatest ones you want. The sleeve changed from metal to plastic and the B2 seal changed from round to square. The part number for the new seal alone (which comes already installed on new B2 pistons) is 140 277 04 55.
- Elevate the car (safely!) for undercar-access. You need room to work.
- Drain the transmission and torque converter remove the transmission pan.
- Put gentle pressure on the rear transmission mount with a floor jack. Then, remove the four bolts that attach the rear transmission mount to the body. Slowly release the floor jack. The transmission should only drop about one to two inches. Lay a protective pan or sheet directly underneath the right side of the transmission toward the rear.
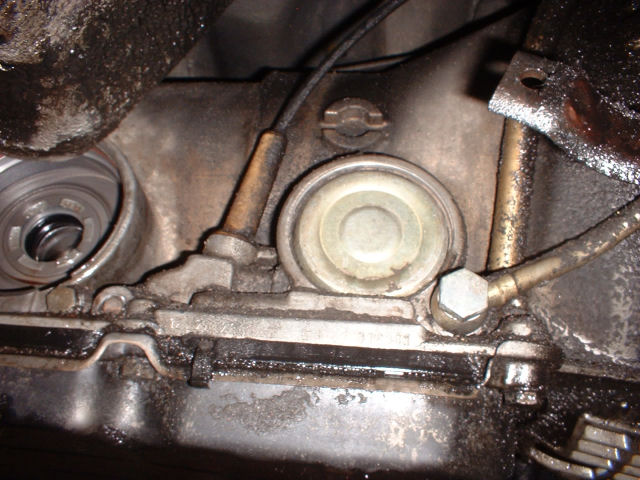
- Locate the B2 piston cover, the rearmost of two large circular covers on the right side of the transmission toward the rear.
The front of the car is this ---> way
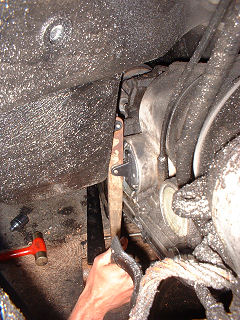
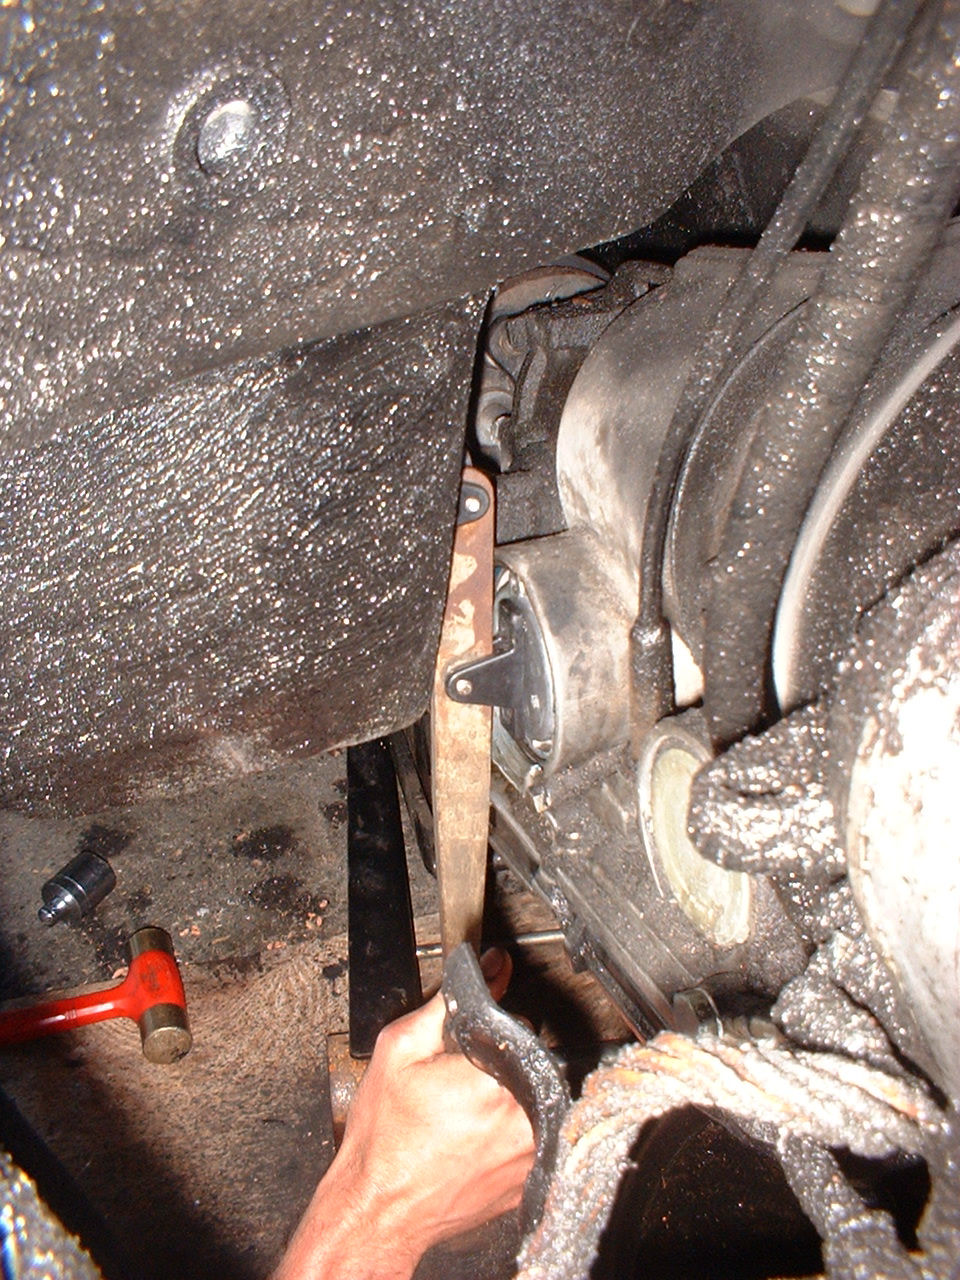
small med big- Using a pry bar, push the rear of the transmission to the extreme left. This will enable you to shift the transmission to the left to gain greater access to the B2 piston cover.
- While pushing the B2 piston cover in, remove the circular spring-type circlip that retains the B2 piston cover. There's a slot in the housing at about 5 o'clock. A long, narrow, regular screwdriver inserted into this slot allows circlip removal. Note that the B2 piston cover has spring pressure behind it, but this tension can be held with your hand.
- After removal of the circlip, let the cover release gradually. You will need to have several shop rags handy, because you will lose some fluid in the process.
- At this point, the B2 piston can be removed by disconnecting it by going up through the pan opening and removing it out the right side of the transmission. If it has already fallen out into your hands in several pieces, well, you know that you've found your problem.
- A most important point: do not, repeat: do not, remove the very large "O"-ring that seals the B2 piston cover. It is near impossible to re-install on a transmission still located in the vehicle.
- If your transmission has a metal sleeve for the B2 piston to slide in, replace it with the improved, plastic version that reduces the potential for binding.
- Installation is reverse of the above, using extreme care and cleanliness; it can be a right bugger to push it back in. Here's a little tool John Berryman made to make this a snap:

Pushing the B2 piston into place
small med big- Replace transmission filter.
- Clean transmission pan, ensuring that no lint remains in the pan before mounting to the transmission.
- Using an inch-pounds torque wrench, torque transmission pan bolts to factory-specified settings.
- Replace transmission fluid. Checking the fluid level in an automatic transmission is best performed by wiping the dipstick clean with one's fingers and then wiping the fingers with a rag. This ensures that no lint enters the transmission.
- Note: Do not overfill transmission. Automatic transmission fluid expands when heated, so it is best to leave the level around a pint low until transmission is adequately warmed up.
- As long as you're in there, change out the K1 spring kit
- Adjust your vacuum ...and you should be back on the road with what will seem like a new transmission.
Richard Sexton - Using a pry bar, push the rear of the transmission to the extreme left. This will enable you to shift the transmission to the left to gain greater access to the B2 piston cover.

