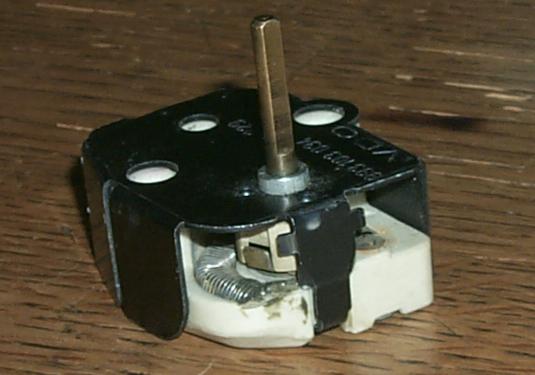
The instrument cluster dash dimmer switch routinely fails and since all dashboard lighting is controlled by this once they fail completely you have no lights on the dash, heater controls, window switches, what have you. But they can be easily fixed.
The first step would be to pull the instrument cluster and remove the rheostat. That's covered
here
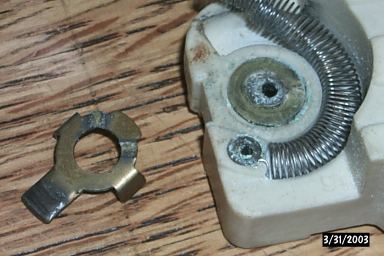
Once you have the rheostat out, remove the metal cover by prying the two retaining tabs just enough so the metal cover comes off. The thing will fall to bits now. You'll have in your hands the ceramic base, a small rotating brass plate, and two small springs that push the brass plate down onto the coiled wire that serves as the variable resistor. The parts don't explode everywhere but you still don't want to lose any so do it over a towel or something.
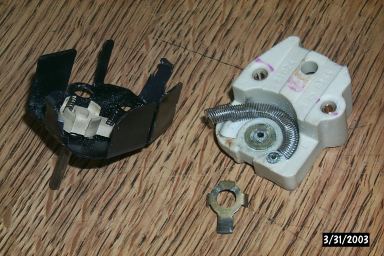
The two problems most commonly found with these are a) carbon build-up on the brass plates and b) failure of the coiled wire. The coiled wire is connected at one end to a brass connector that provides electrical continuity and at the other end it is held in place presumably by some sort of adhesive so the entire coil sits in its channel in the ceramic base. Sometimes the coiled wire can be broken - you're on your own there. I doubt you can make a decent solder joint but you might be able to carefully surround the broken ends with solder to provide continuity and apply some JB Weld to provide mechanic strength. Maybe. My wire was not broken, just unattached at the non-electrical end so a small amount of JB Weld there affixed it properly.
But I'm getting ahead of myself here, you need to address the carbon build up on the brass plates first. I usually use an ink eraser for this sort of thing but it had near-zero effect here so I dumped all the bits into some "silver dip" jewelry cleaner (sulphuric acid and urea) and let it soak for 30 minutes. When rinsed and dried nearly all the carbon was gone and a quick once over with an ink eraser made all the brass parts shiny as new.
Reassembly is pretty straightforward although there is one trick. When you put the springs back in place and put the rotating brass part on them you need to hold it down with a small knife blade when you re-attach the other half. Once you've got it on just put the metal cover back on and fold the tabs in and you're done.
Here's a shot of the repaired rheostat, good as new.
Richard Sexton