|
|||||
|
|||||
|
Introduction
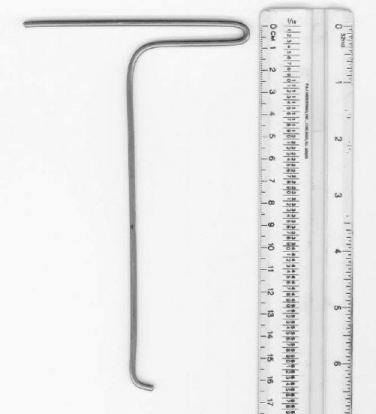
There are many issues with the instrument cluster in my 1983 W126 300SD that I wanted to address: the dashboard dimmer had become less and less reliable and finally failed - I had no dash lights. All power to the various switch lights (ie, windows, heat etc) is controlled by that dimmer so when it fails, you aint got no lights. The clock wasn't working. On the rare occasion when the dimmer switch would work the lights weren't very bright at all, and one of the turn indicator displays was not a green arrow, it was a hole that you could see a green bit of plastic in there someplace. Oh, and the fluorescent orange on the gauge needles had faded to light yellow. These are all easily fixed with about an hours work or so. While this article pertains specifically to a 1983 300SD it should apply roughly to any W126 and to some extent with any similar Mercedes such as 123 or 124 chassis cars. I rounded up all the bits and pieces I'd need. Phillips screwdriver, set of jewelers flathead screwdrivers. New (or rebuilt) dash dimmer rheostat. Three W3W bulbs. I'm looking at the Narva box I have and it indeed says 17097. These bulbs fit into the plastic bases and are removable, not like the small bulbs which are moulded into their bases. A paint brush and some fluorescent orange paint and two 100uF 35V DC (Radio Shack part number 272-1028) electrolytic capacitors. Instrument Cluster Removal First, disconnect the battery. The instrument cluster is friction fit into the dashboard. Nothing but stiction holds it in place - compared to say, earlier models such as W108 that while they were also friction fit they were retained with a knurled nut. Mercedes makes and sells tools to pull the cluster but you can make one easily out of a coat hanger. Take an 8 inch piece and bend 1/2" of one end over about 150 degrees, like a "J" shape. You want about 4 inches of shank, then bend the rest over to make a handle. You'll need to make two of these which you can easily do from one coat hanger. Here's what they should look like:
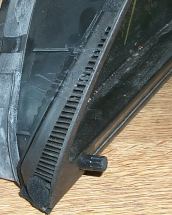
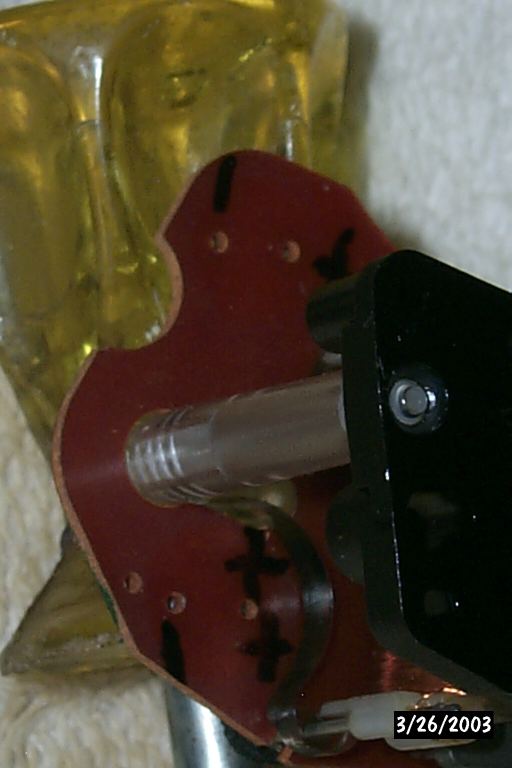
Now, you gave to insert this tool in between the cluster and the dash, with the hook facing down, then rotate it inwards so the hook catches in the cluster. There is 3 inch area that the hook can grab on to in the middle of each side. It's about 1/2 - 3/4" deep, as pictured here:
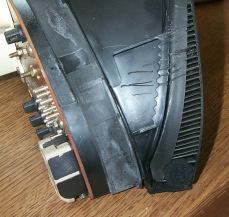
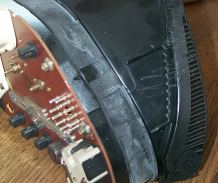
You don't need a lot of force, but you do need some. If you pull the hooks each side one at a time you will be able to wiggle the cluster forward a few inches to the point where you can pull it out further by hand. It's still attached to all sorts of wires so just pull it out enough so you can mark and unplug the connections. At this point it's worth mentioning that if your dimmer switch, clock and gauge needles are ok and you just want brighter dash lights, simply replace the two 3 watt bulbs and put the dash back in. That's good enough in some cases. You DO want to mark all the connections or you'll simply hate life when you're putting it back together. Once you've taken a picture or made notes, disconnect all the connections and take the cluster to your bench or desk. Here's the back of the cluster:
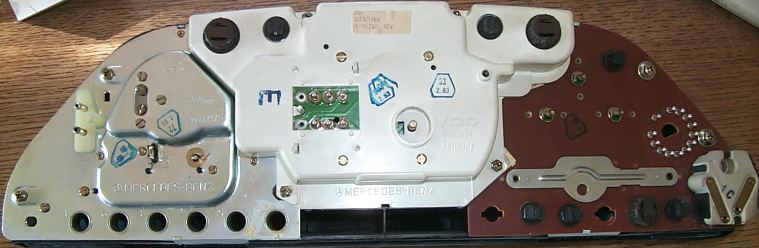
Replace The Bulbs This is a good time to renew the bulbs. Here is a map of the back of the cluster. There are three 3 watt bulbs: 2 for dash illumination and one for the brake light. Twist the socket then pull it out - the bulb pulls out of the socket. They'll probably be fairly black if they're original and are probably the reason your dash lighting was dim. The bulb designation is "W3W". The other bulbs are much smaller, and are 1.2 Watts and don't seem to turn black with age (they simply aren't on long enough to darken). Replacement bulbs are sold by Narva as part #17035. You don't need to replace them as long as they're clear. If you do need to replace them note that the bulb does not come out of the socket, they have plastic molded bases and you need to get them that way, not as replacement bulbs only. Here's a picture of two original 1983 bulbs and one new one: 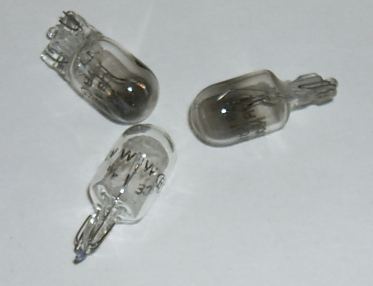
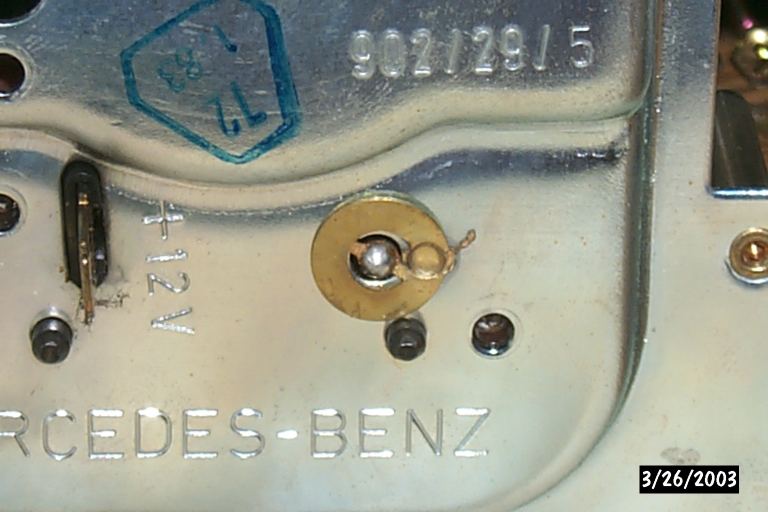
Fix The Clock Chances are high your clock doesn't work. There are two capacitors (100 pF 35V Radio Shack part number 272-1028) that routinely fail. Unscrew all the screws that hold the instrument pods in place (they are circled in blue on the map) and take the instrument pods off. Carefully pry off the clock hands with your fingernails and place the tach/clock pod face down on a towel on your bench or desk. Unscrew the two screws that hold the clock in, then turn it over and unscrew the 3 small screws that hold the tach/clock dial in place. NOTE: Never touch the face of the dial - minute amounts of oils on your fingers will make a right mess of it. It goes without saying you should wash your hands with soap and water once you're inside the instrument cluster. Now you need to desolder the ground pin from the round brass disk on the back of the pod (illustrated below) - the ground pin for the clock is in the center of that blob of solder, when you melt that you can remove the clock from the tach/clock assembly.
 Now that you have the clock out, find the two capacitors. They will look like the ones you bought to replace them and look like small soda pop cans with two leads that go into the circuit board. Note that they have a positive side and a negative side. They will most probably me marked with a + on the positive side although some capacitors (especially the ones Radio Shack sells) are marked with a - on the negative side. If you screw up and lose track of which side is + or - on the circuit board there's a picture here. Now simply desolder the caps and remove enough solder so you no have two holes where the leads to the cap go into the circuit board. Poke the leads of the new caps though the board, then trim the leads so very little is sticking through. Solder the leads in. You've now fixed your clock. You probably don't want to trim the leads beforehand as the hold centers probably won't match the lead spacing and it's a bit of a pig to do it that way; ask me how I know. The old (gold) and new (blue) caps are shown below:
 I was lazy on this step and couldn't find my solder so I reused the solder that held the original caps. The clock proved to be intermittent, so I ended up pulling the cluster again and re-soldered them. It's worked fine ever since. Clean the Bezel Since you've taken the instrument pods out you are now left with an empty shell of a housing with a clear plastic bezel which if you look carefully will almost certainly appear foggy. You can not get the bezel out, but you must clean it. I used glass cleaner and a lint free cloth. Note that you'll want to avoid lint at all costs (it'll bug you when you stare at bits of line when you're driving) or any scratches. Cloth works better that paper towels for this. Clean the bezel throughly inside and out. Paint the Gauge Needles Most of these cars have had their gauge needles fade from signal ("fluorescent") orange to a medium to light yellow. You can fix that; you'll need some orange paint and a brush - patience and a steady hand. Skip this part if you think you're gonna slop paint all over the instrument dials like some sort of Jackson Pollock painting. The brush should be as soft and small as possible, paint is what you can find. I used spray paint sprayed into the cap, but it is possible to get paint for model cars in the right color if you look around. Use single strokes to apply the paint and understand it may take many coats. I found that if I did anything other than make one pass with the brush then it would dreg up the old paint and the yellow would poke throgh. The spray I used was so very thin I had to apply about 8 coats before the gauge needles looked solid orange. Let the hands dry, put the clock hands hack on. Now you can put the instrument pods back in the housing. With any luck it'll look like this: 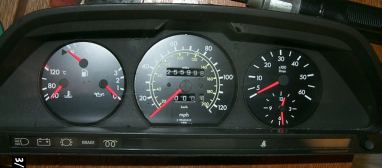 The Dimmer Rheostat The dimmer is held in place by one screw which you would have had to undo to remove the instrument pod. Once the screw is out it simply pulls off the two metal pins. Replace it with a new one or rebuild it. Failing dimmers, cloudy bezels and blackened old light bulbs are what contribute to poor dash illumination. Once these things have been addressed your dash lights will be as bright as when they were new, which is to say, fairly bright. Put It Back In The Car Place the instrument cluster almost in the opening and plug all the electrical connections back in according to the diagram or photo you made. I had the big square connector fall off which gave all sorts of bizarre symptoms; when I pulled the cluster again to check it out it was obvious the connector had come off, so make sure they're on tight. Now just reconnect the battery and fire it up. Now you should be able to see your instruments at night. Richard Sexton |