|
|||||
|
|||||
Here's the problem: the "old style" seat switch has wires soldered to the pins while the "new style" seat switch uses connector blocks. There are two of them. Internally, the switch has two separate (that is, electrically isolated) circuits for the two blocks. The front one controls seat forward and back, and front up/down while the back one controls the seatback and rear up/down. The front connector block has the 4 wires that go to the motor, 1 wire for +12V and one wire for ground. The seat connector block has the 4 wires that go to the motor and +12V. But there's no ground! The purpose of the switch is to connect the two wires of the selected motor to +12V and ground to make it move one way, or to make it go the other way, ground and +12 are applied to the opposite wires.The other connector block has 12V and ground. I guess the old switches bussed the ground from one circuit to the other, but the new ones don't, so the new switches are not a drop in replacement.
So here's what you do.
First prepare a work surface that's clean, large and not something where you'll lose little bits.
Now you have to open up the switch module. You'll see small retaining clips all over the place, about 4 or 5 of the. Pry them open with a small screwdriver, jam one in then jam another in. When you have pried one open, use more screwdrivers to pry another open, when you have 2 open the rest will open real easy.
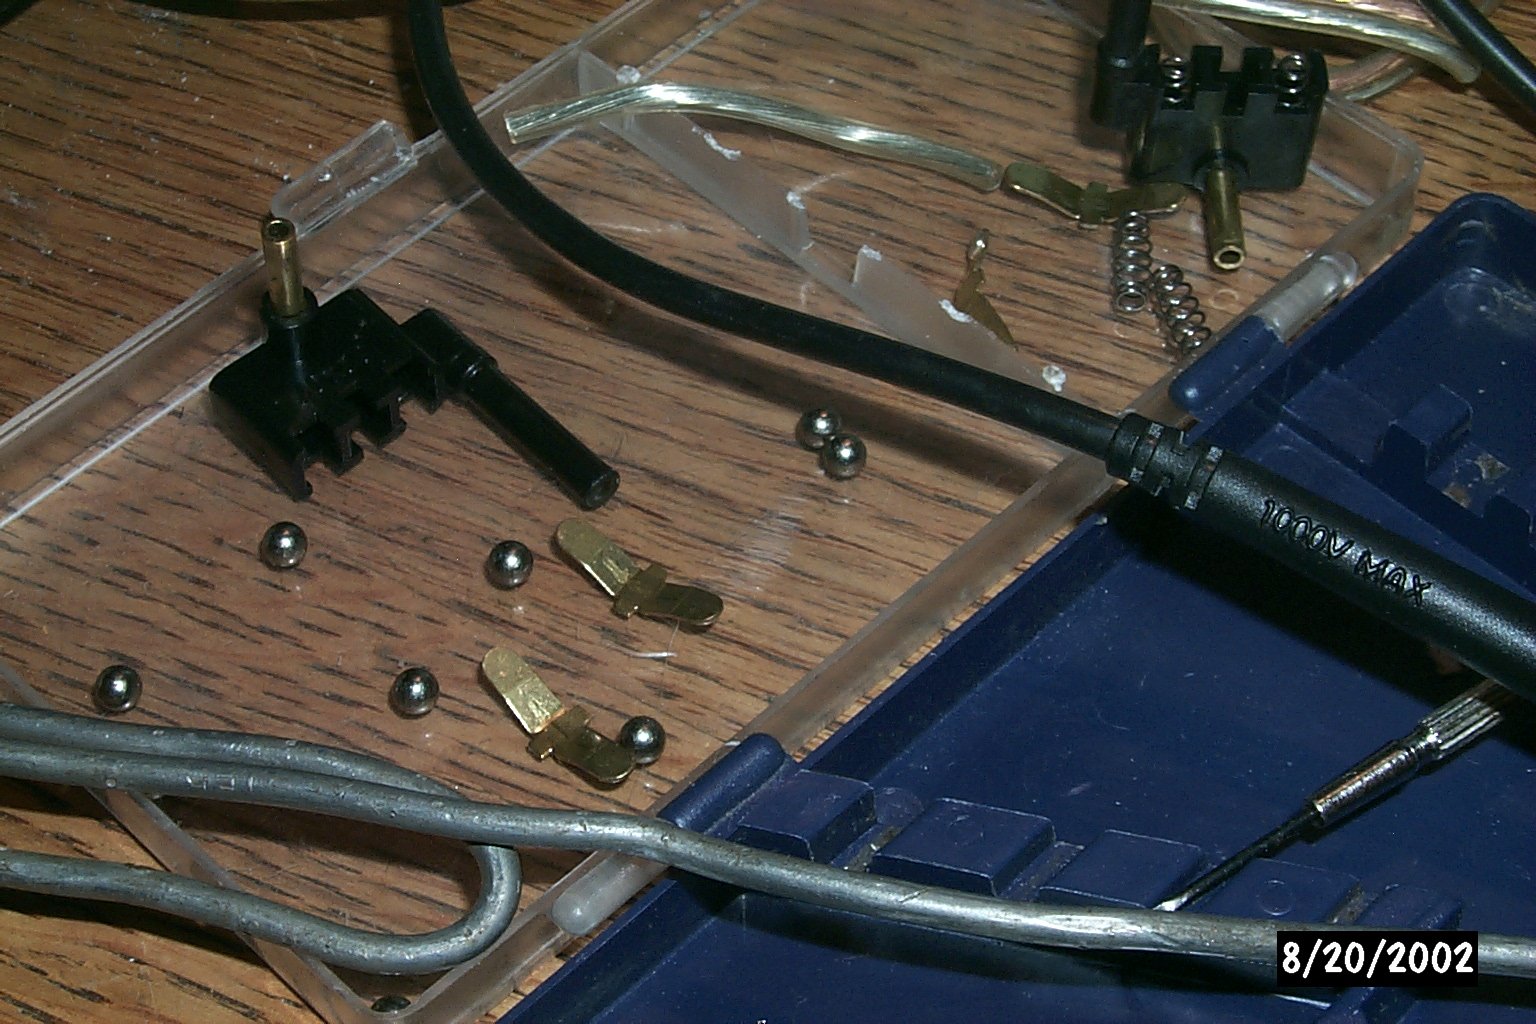
Here's the worst part: when you open the switch, 16 small ball beatings, 16 small brass plates and 6 plastic sliders and 8 brass rods will come tumbling out. I've opened several of these and never been able to stop them from coming out. But don't worry, they're really really easy to reassemble and even if you lose a piece or two you can use parts from your old switch which are the same.

image2.jpg
small med bigPut all the parts somewhere safe, that is remove all the switch parts, brass plates, springs and bearings.
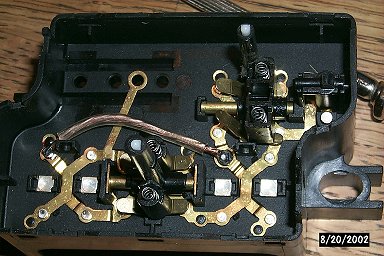
Now you have to solder a wire on to buss ground from the first block to the second. There isn't really a good place to do this so you have to solder it to the end of one of the contacts.

image1.jpg
small med bigNow "all" you have to do is reassemble it. It's actually not hard although the number of little bits make it look daunting on first glance. Put the brass sliders in place, put the plastic switch on, drop a ball bearing into each hole, drop a spring on top of each and drop a ball bearing on top of each one. Put the cover back on carefully. I realize this sounds overly complicated but it's not when you've got this parts all in front of you. Don't be afraid, just do it, you'll be surprised at how easy it is to actually do.
Electrically test it with a volt meter. If you've made a good soldered connection is should be right now. Install it in the car. The only gotcha here is the alignment of the switch. If it's not right, when you put the final trim plate on it can actually prevent there being enough movement of the switch (usually the seat-back switch) for it to make contact, so if it tests out ok with a voltmeter but doesn't work when installed, pull the last trim piece off, move the switch a bit, tighten it, and it should work. Mine does.
I have absolutely now idea what's going on with these switches; without a ground on the second connector block or some way to connect the ground from one side of the switch circuitry to the other they'll simply never work and I don't understand why Mercedes sells them this way or what they're for. Maybe I'm way off base here and there's some simple explanation, but I've spent hours looking at wiring diagrams and playing with a volt meter and frankly don't get it. But, mine does work now with this modification.
The great irony of all this of course is once you've mastered taking a switch apart and putting it back together you probably could have repaired your old switch - IF - you don't mind unsoldering all the old wires and soldering them back on as there is no way you're going to be able to open the switch while it's still wired to the door. Those little parts will just fall everywhere and you'll hate life itself if you try this.
Richard Sexton
